

Run your whole
website yourself.
This is your private learning hub — a simple, friendly place that teaches you how to manage every part of the Excellence Snowsports website from the admin panel. No code. No stress.
Use the menu at the top to jump straight to any topic in one click. Take it one step at a time, and remember: you cannot break the design.
Jump to a topic
- 1 Getting started & logging in →
- 2 Editing text & images →
- 3 Your 18 pages, one by one →
- 4 Site Control settings →
- 5 Getting found on Google →
- 6 Maintenance & safety →
Everyday Editing
Change any text, swap a photo, or update your prices in a few clicks.
Page by Page
See every page of your site and exactly where each part is edited.
SEO & Google
Help the right guests find you with simple, guided SEO steps.
Logging in & finding your way around
Everything you manage happens in one place — the WordPress admin panel. Let's get you in, then I'll show you the menu so you always know where to click.
1. How to log in
You only need your web address, your username, and your password.
- In any web browser, go to
https://excellence-snowsports.com/wp-admin. - Type your username (or email) and your password. I sent these to you safely.
- On your own computer, tick Remember Me, then click Log In.
- You land on the Dashboard — the home screen of your admin panel. You're in!
2. The admin menu — your map
Down the left side is a dark menu. This is your control centre. You will use a few of these every day; the rest you can safely ignore.
| Menu item | What it is for |
|---|---|
| Page Content | Your custom editor — change the text and images of all 18 pages from simple boxes. This is the one you'll use most. |
| Site Control | Your custom panel: contact details, social links, booking links, header/footer, homepage banner, contact form. |
| Media | Your photo library — every picture on the site lives here. |
| Team | Add and edit your instructors. The Instructors page updates by itself. |
| Reviews | Guest reviews shown on the homepage. |
| Appearance › Menus | Edit the header and footer navigation links. |
| SEO (Yoast) | Your Google tools (see the SEO section). |
| Plugins / Settings | Advanced — please leave these alone (see the rules below). |
3. One simple rule of thumb
4. The golden rules
Good news first: you cannot break the design. Editing words, photos and settings only changes that one thing — never the layout. So relax and explore.
Always safe to do
- Edit any text on any page.
- Replace or upload images.
- Change prices, phone, email, address and social links.
- Add or reorder instructors and reviews, edit menus, and create new pages.
- Fill in SEO titles and descriptions in Yoast.
Please do not
- Turn off or delete plugins (Astra, Elementor, Site Control, Reviews, Yoast, LiteSpeed).
- Switch the theme, or edit theme/plugin files.
- Change a page's Template (it controls the header & footer).
- Change the web address (slug) of existing pages unless you really must.
- Install a second SEO plugin — Yoast already does it all.
Editing your text & pictures
I built a simple editor just for you, called Page Content. You change the words and photos in plain boxes, click Save, and the design never changes — only the words and pictures you set. No code, no page builder. This is how you edit every page.
1. Open the Page Content editor
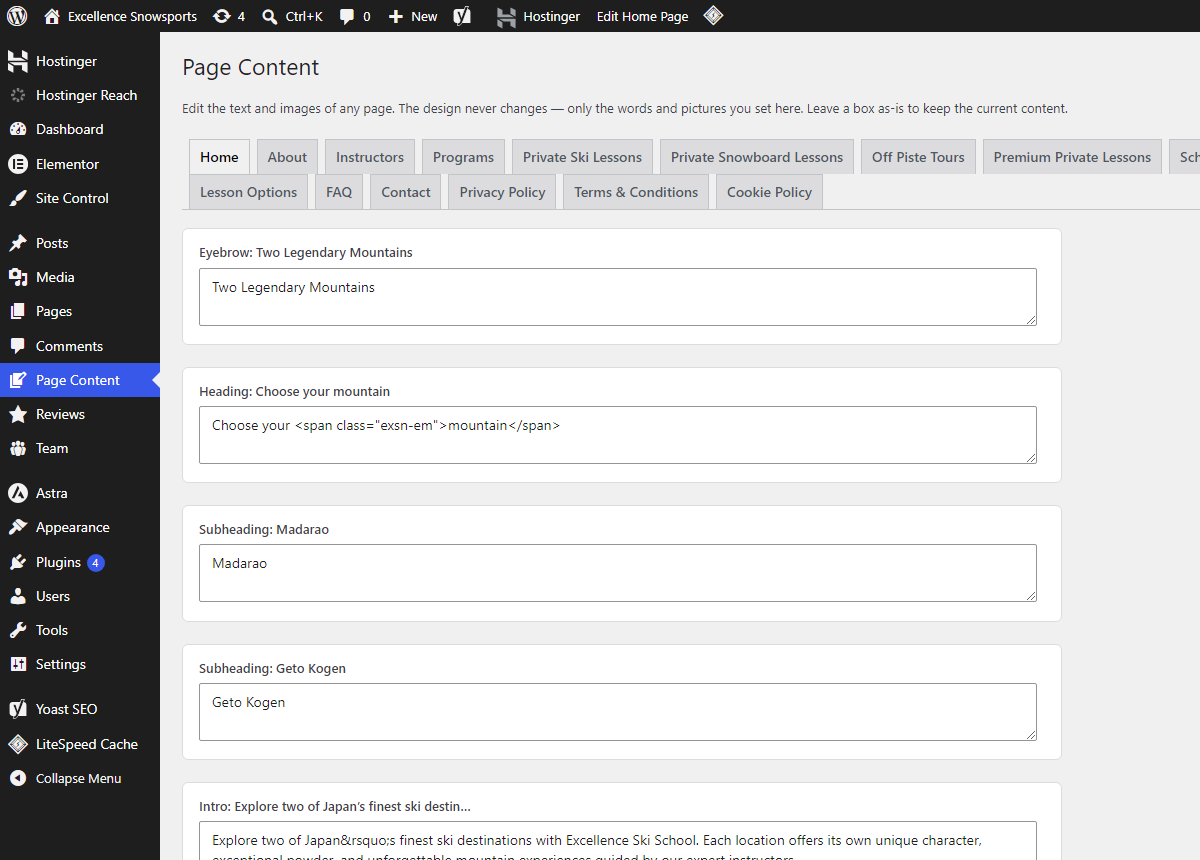
- In the left menu, click Page Content.
- Along the top, click the tab for the page you want — Home, About, Private Ski Lessons, and so on.
- Each white box is one piece of the page. Click inside a box and type your new words.
- Scroll down and click Save changes. You'll see "Saved. Your changes are live."
- Open the live page and press
Ctrl/Cmd + Shift + Rto see your update.
<span class="exsn-em">mountain</span>.
Only change the word in the middle (here, mountain) and keep the < > parts exactly —
they create the special styling.2. Change a picture
Image boxes have a Choose image button instead of a text box.

- In Page Content, find the image box you want to change.
- Click Choose image. Your Media Library opens.
- Pick a photo already there, or click Upload files to add a new one from your computer.
- Type a short Alt Text (e.g. "Private ski lesson in Madarao") — this helps Google. Then click Select.
- Click Save changes.
3. The Media Library
This is your one home for every image. Go to Media in the left menu to upload new photos in advance, find old ones, and — important for Google — click any photo to set its Alt Text.
4. Editing your menus
The links in your top header and footer are controlled in one place.
- Go to Appearance › Menus.
- At the top, choose which menu to edit: Primary is the top header; the Footer menus are the footer columns.
- To add a link, tick a page on the left and click Add to Menu.
- Drag items up or down to reorder. Drag an item slightly right to make it a drop-down child.
- Click Save Menu.
Need a brand-new page?
Your existing pages are all edited in Page Content above. Building a new page from scratch uses the developer's design tools — so if you'd like a new page (a seasonal offer, a new program), just send me a message and I'll set it up on-brand for you, ready for you to fill in with Page Content.
Your 18 pages, one by one
Here is your whole website. Click any page to see what it looks like and exactly where you go to edit it. No searching, no scrolling — just click.
Your custom control panel
I built this panel just for you. It keeps all the "global" settings — the things that show on many pages — in one friendly place. Click Site Control in the left menu to find these.
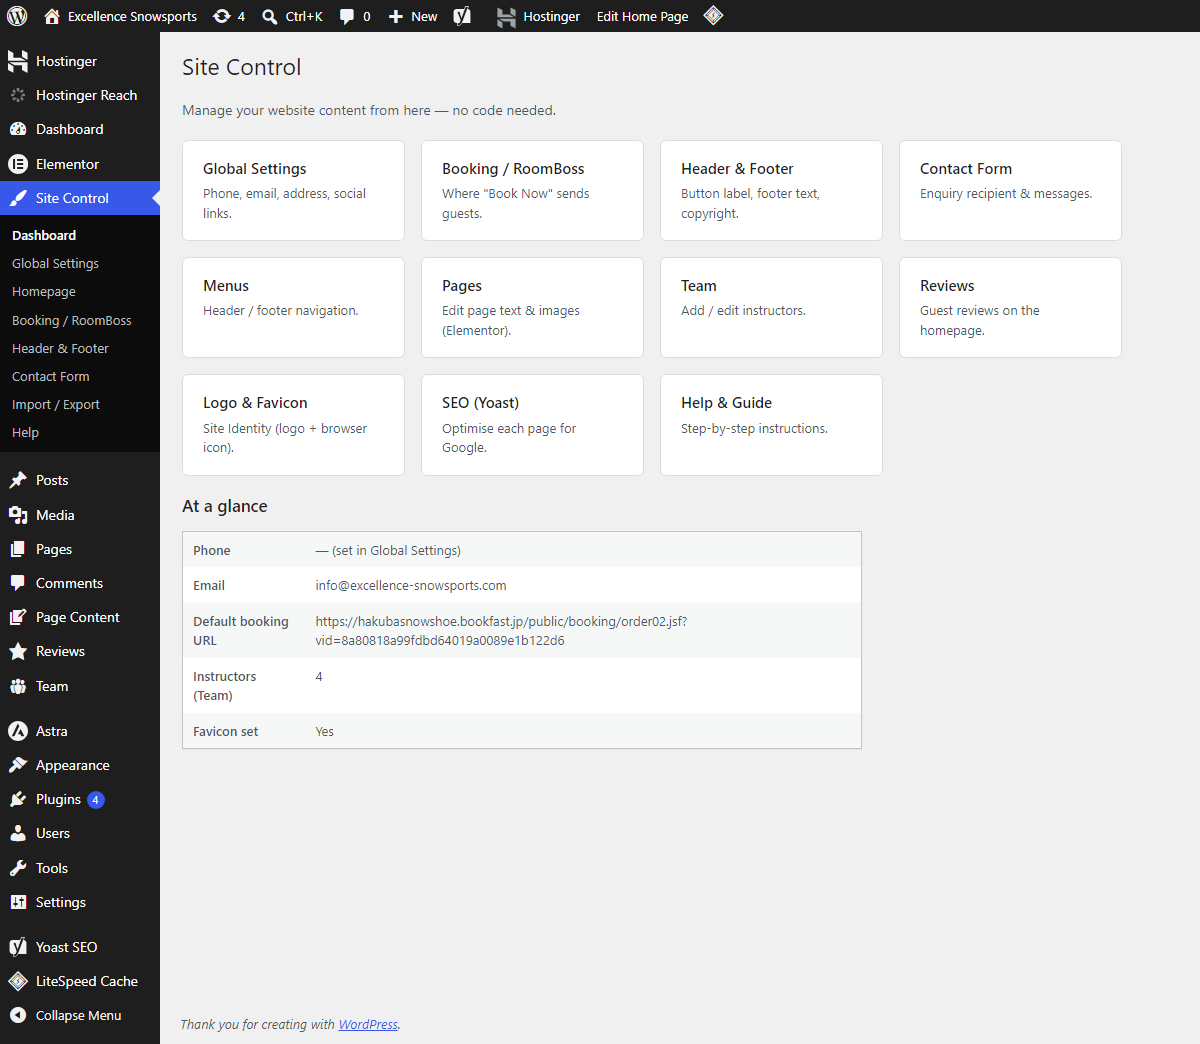
Contact details & social links
Your phone, email, address and social icons show in the footer and on the contact page. Change them once here and they update everywhere.
- Go to Site Control › Global Settings.
- Fill in Phone, Email and Address.
- Paste your full links into Instagram, Facebook, LinkedIn and WhatsApp (leave a box empty to hide that icon).
- Click Save Changes.
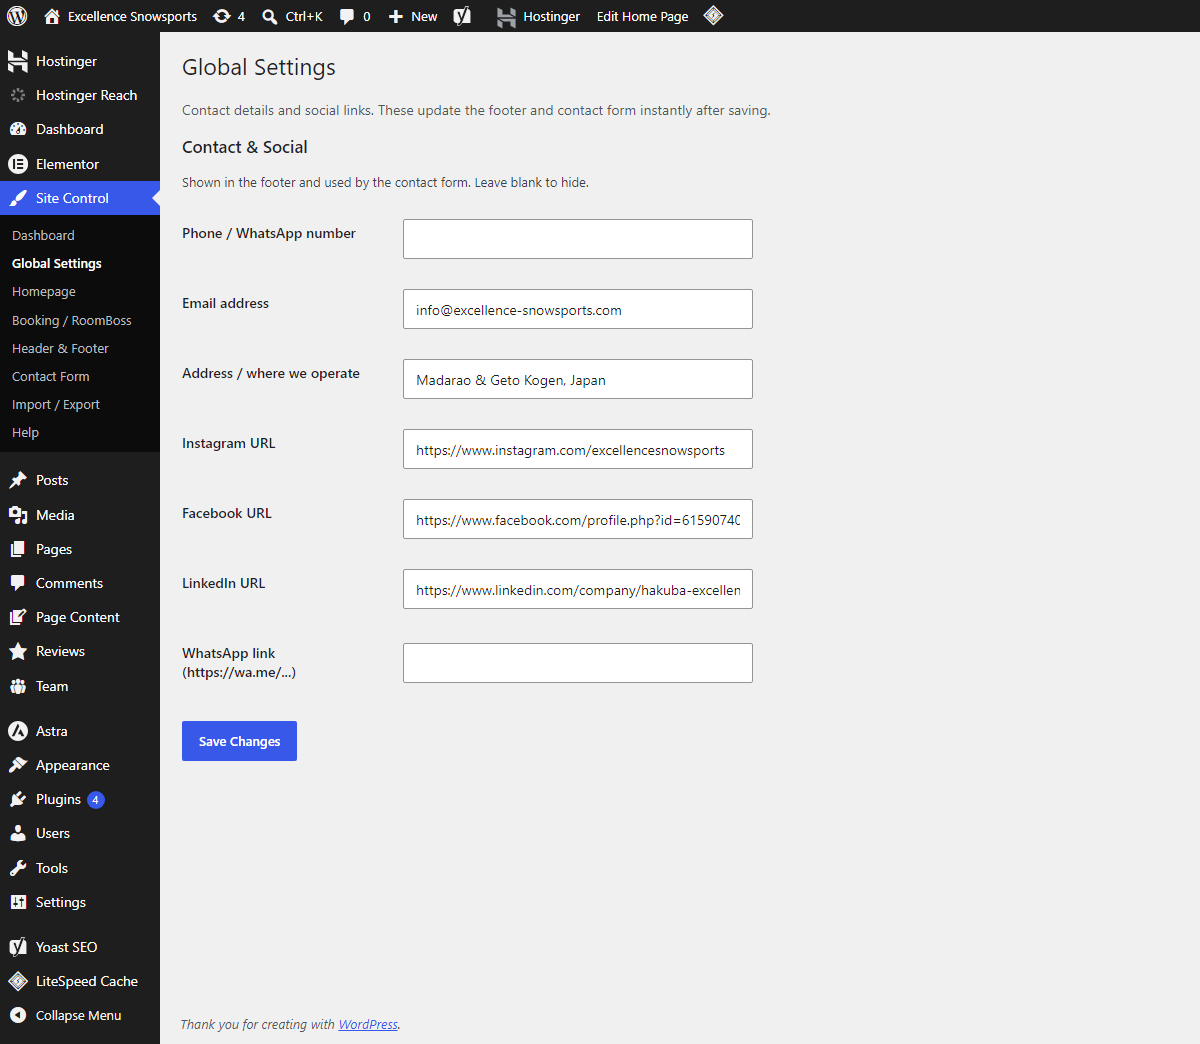
The homepage banner
The large banner at the very top of your homepage has its own simple editor.
- Go to Site Control › Homepage.
- Edit the small top line, the heading, the sub-title, and the button label & link.
- To change the background, click Choose image and pick a photo.
- Click Save Changes, then hard-refresh the homepage.
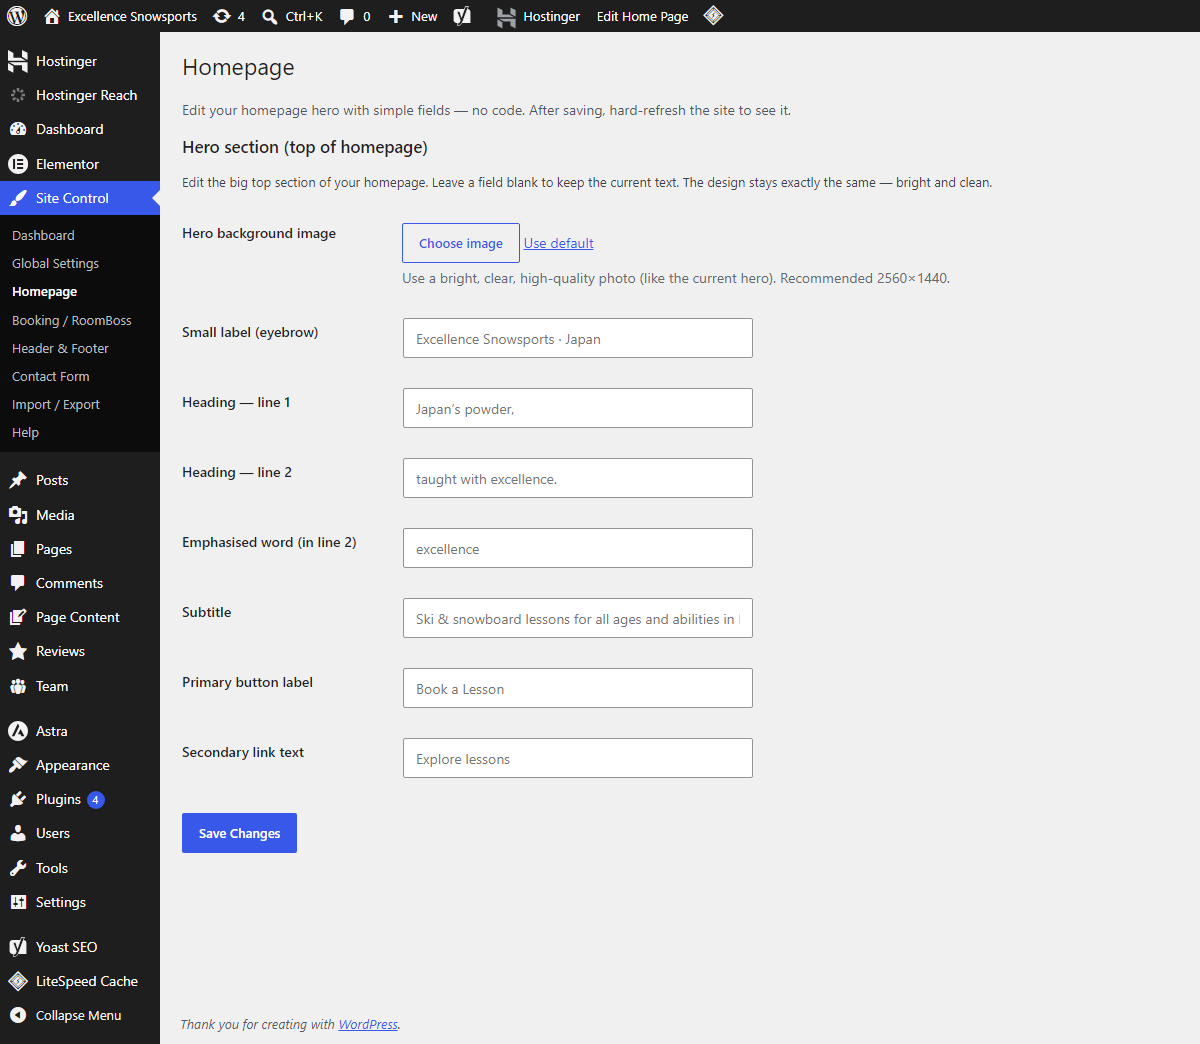
Header, footer & the booking button
Header & Footer
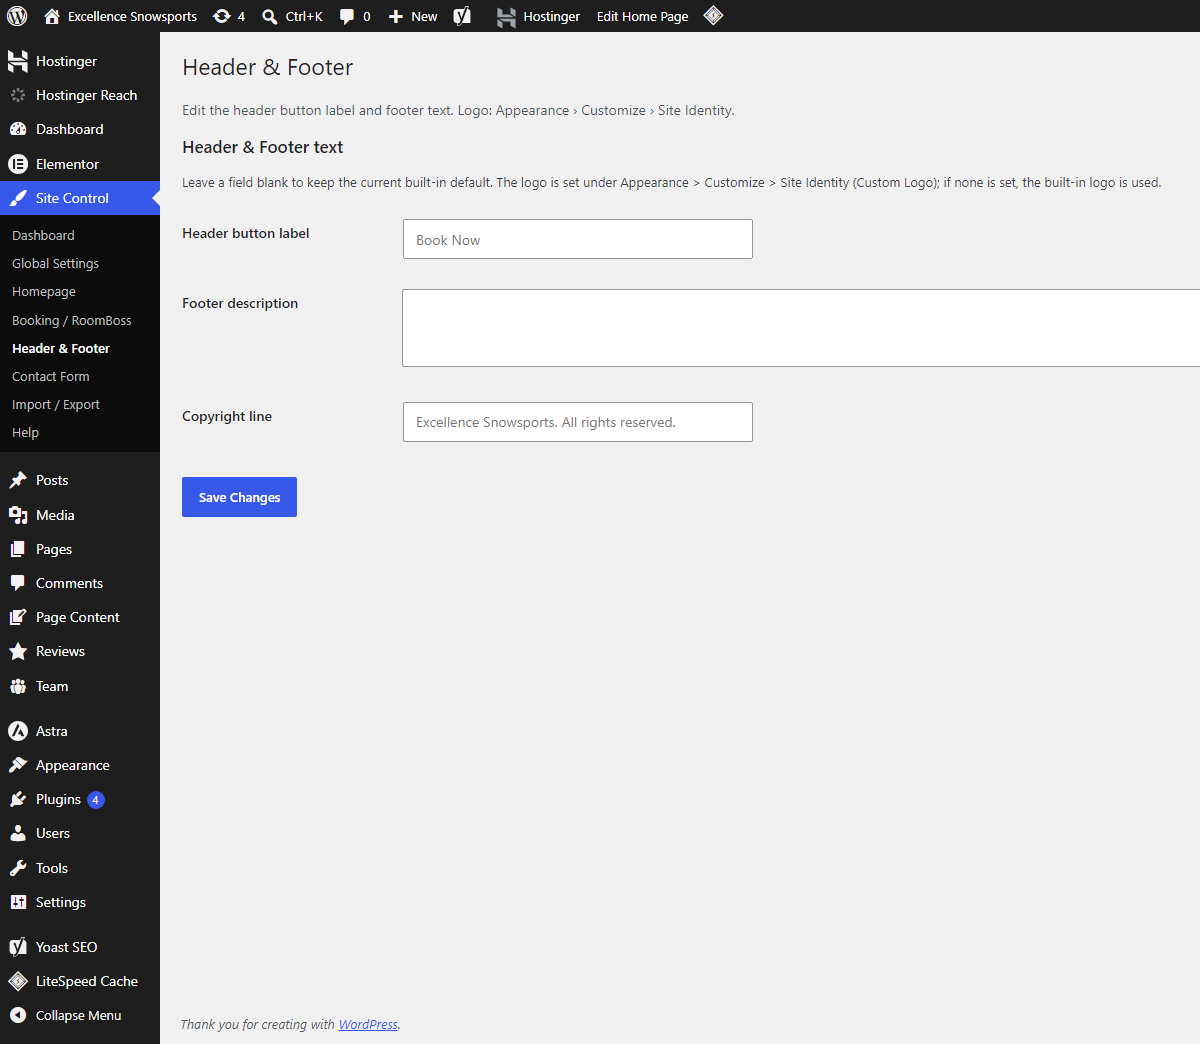
Site Control › Header & Footer lets you change the header button label (for example "Book Now"), the footer description, and the copyright line. Leave a box empty to keep the default.
Booking / RoomBoss
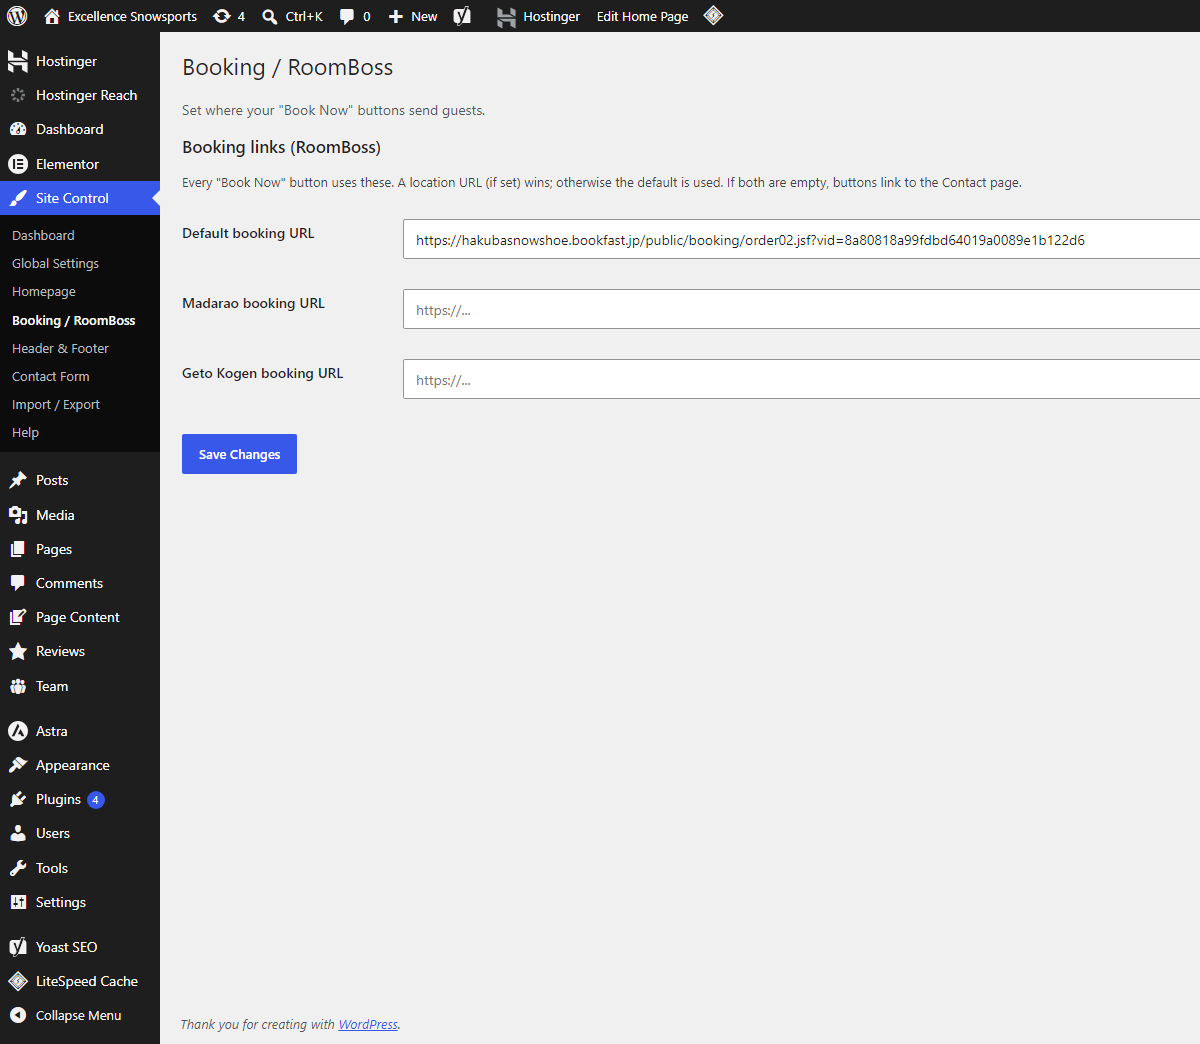
Every Book Now button reads its link from Site Control › Booking / RoomBoss. Set the link once, click Save, and all buttons update together.
The contact form
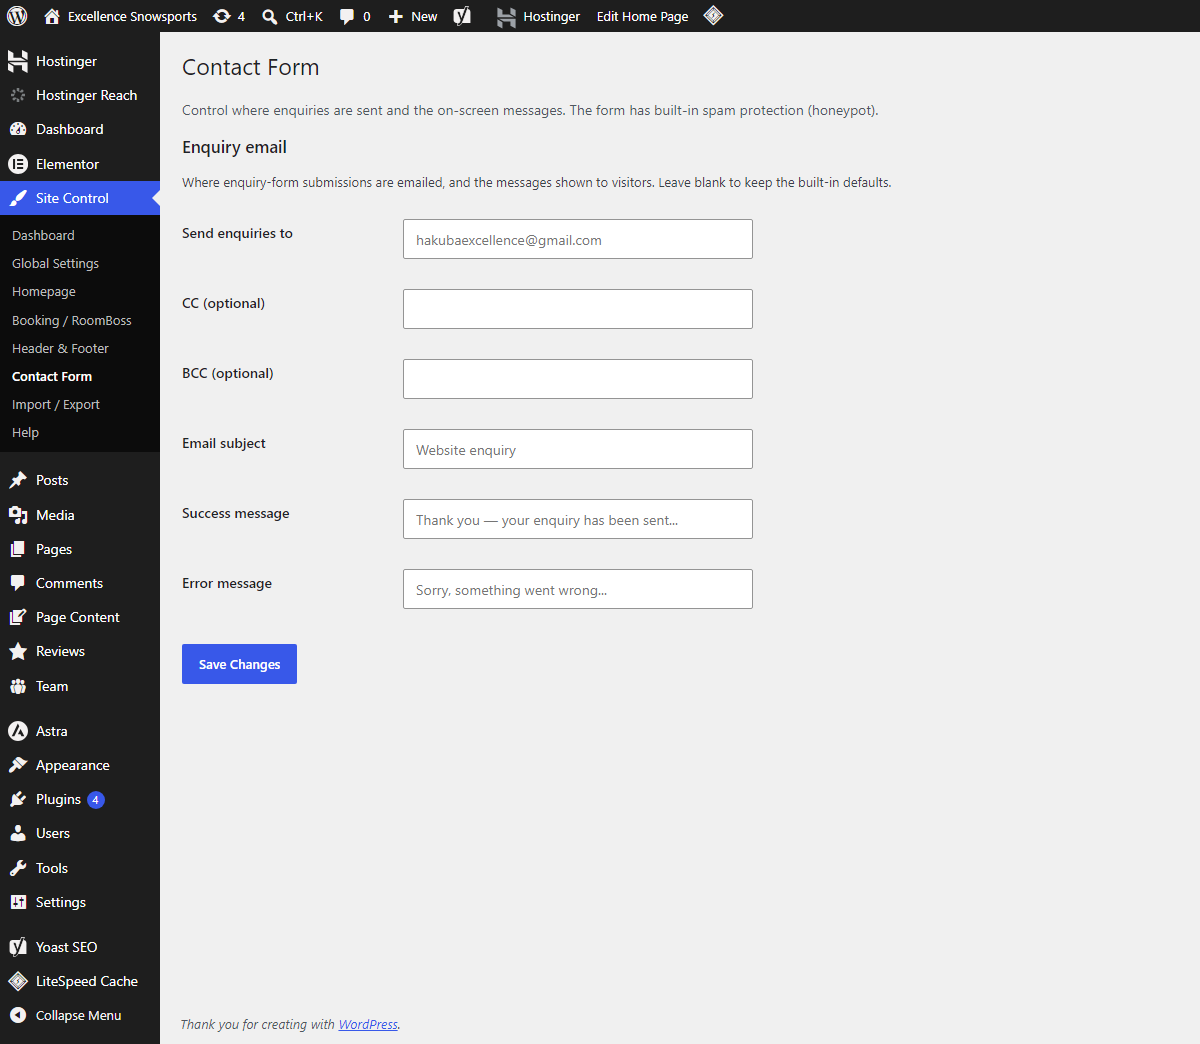
- Go to Site Control › Contact Form.
- Set the recipient email (where enquiries go), and optional CC/BCC.
- Edit the success and error messages guests see after sending.
- Click Save Changes.
Backup your settings
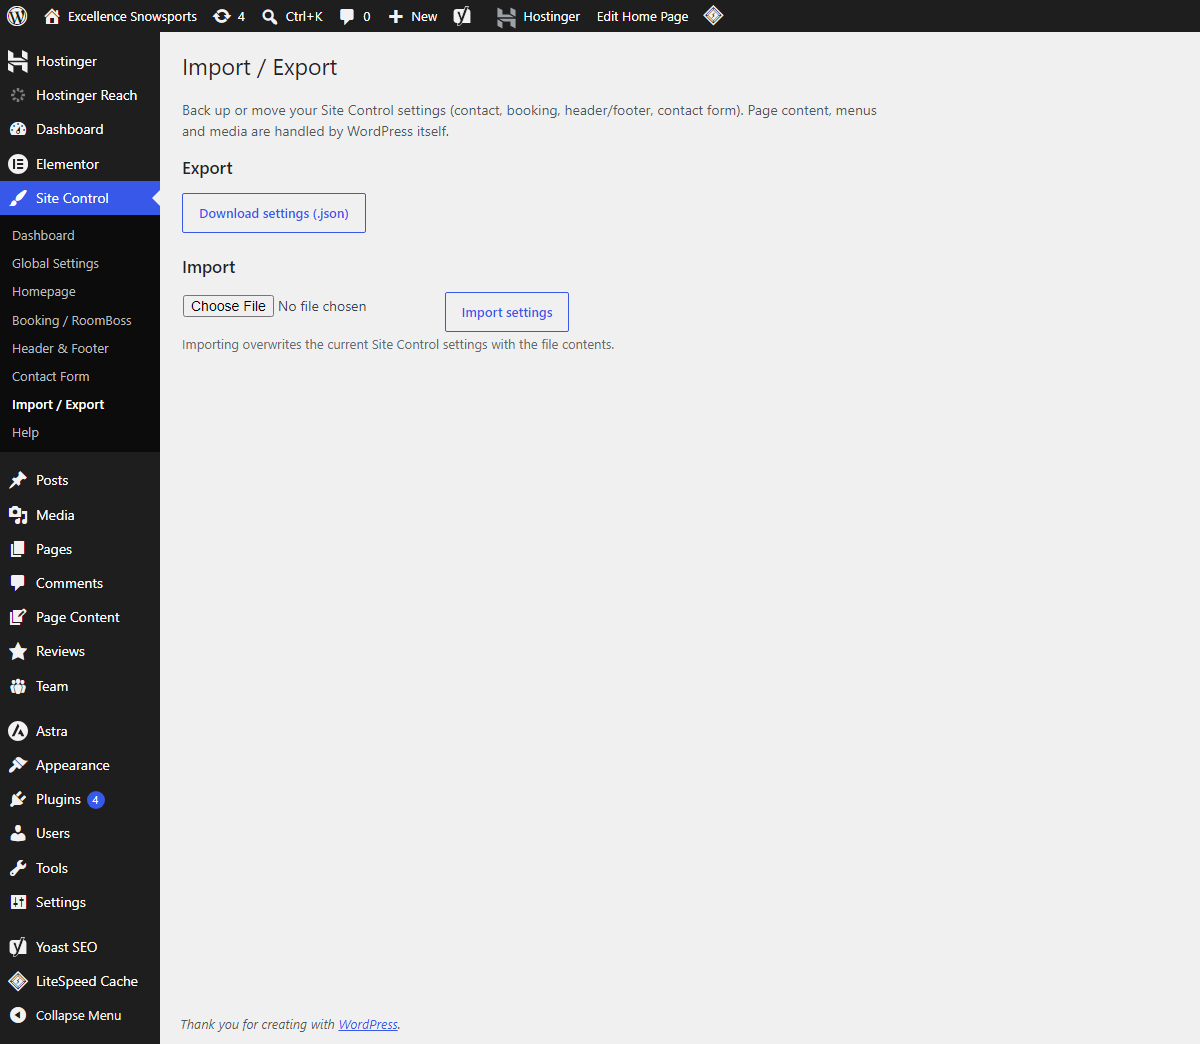
Site Control › Import / Export saves all your settings to a file, or restores them from one. A quick safety net before bigger changes.
Instructors, reviews & logo
- Instructors: the Team menu — add a person, set name, role, photo and order. The Instructors page updates itself.
- Reviews: the Reviews menu — add or edit the guest reviews on your homepage.
- Logo & favicon: Appearance › Customize › Site Identity (leave the logo empty to keep the built-in one).
Prices — add, edit & remove rows yourself
Your price tables are now fully yours. Change a price, add a new row, or remove one — in seconds, with no developer. Your changes appear on the Pricing page instantly.
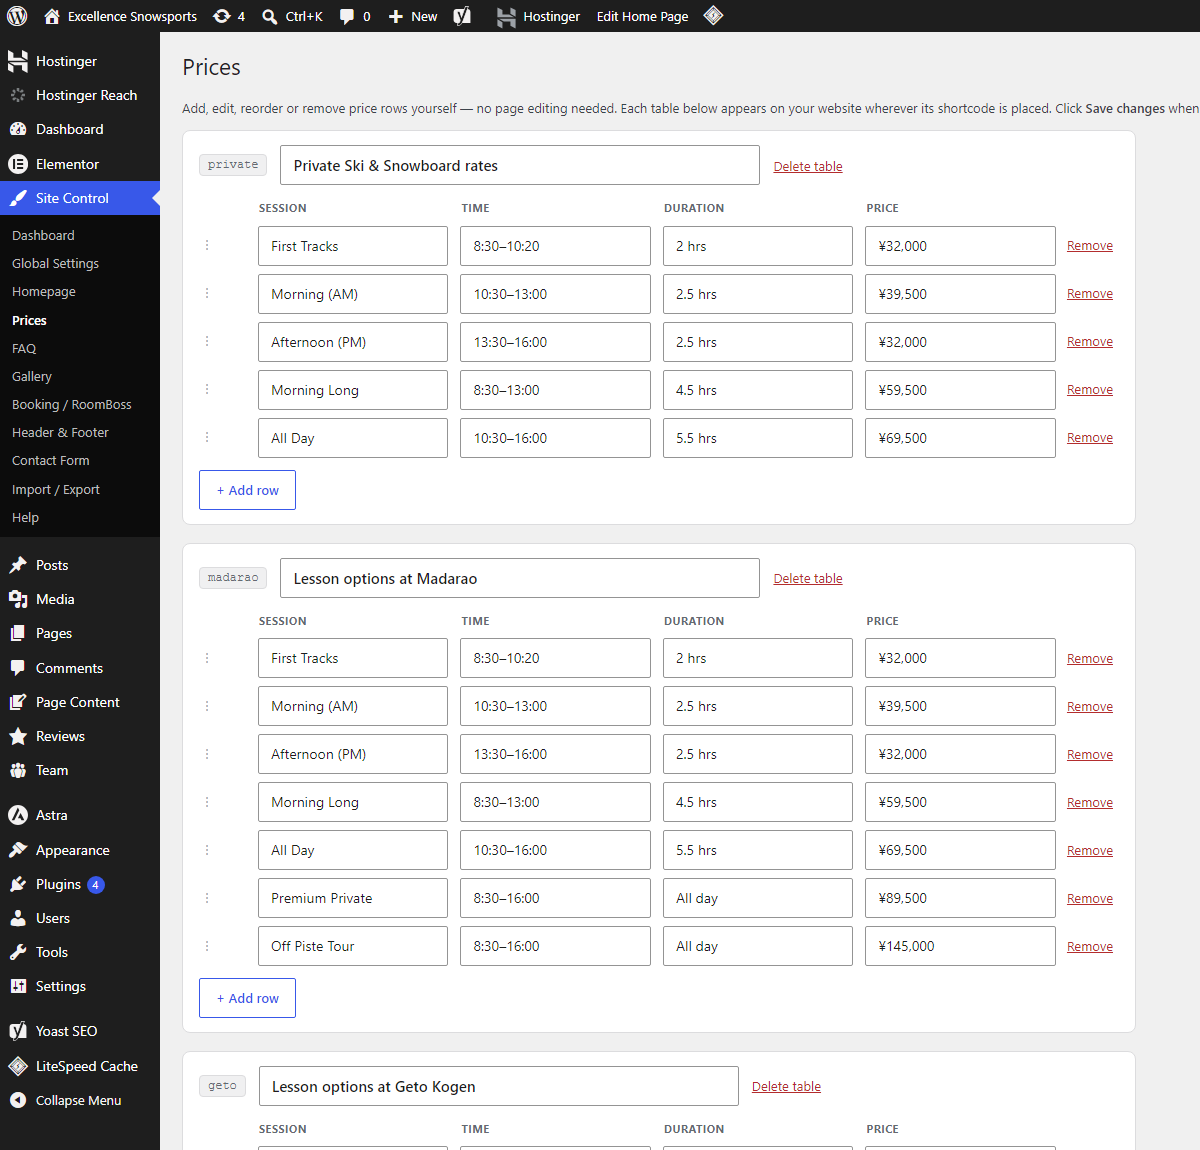
- Go to Site Control › Prices.
- To change a price, just type the new value in its box.
- To add a row, click + Add row at the bottom of a table and fill it in.
- To remove a row, click Remove next to it.
- Click Save changes. Then hard-refresh the Pricing page to see it.
[exsn_prices set="my-table"]). To show it on a new page, edit that
page in Elementor, add a “Shortcode” widget, and paste the code. (Or just send me the table’s
id and I’ll place it for you.)FAQ — add & edit your own questions
Add brand-new questions, edit existing ones, or remove any — yourself. Each set powers a different page, so you can have different FAQs on different pages.
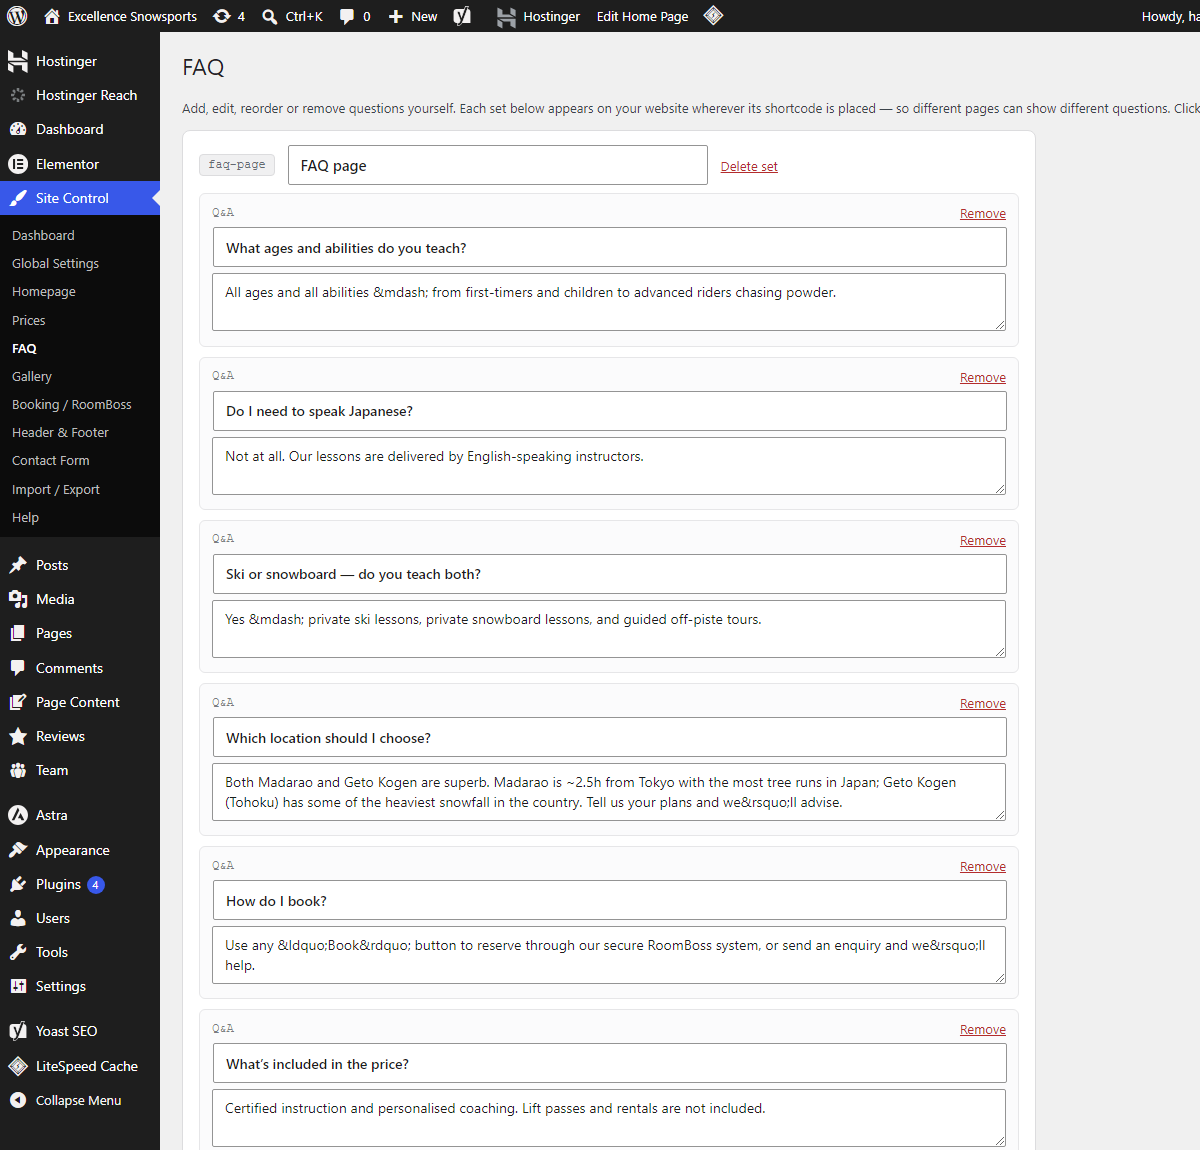
- Go to Site Control › FAQ and pick the set (e.g. FAQ page).
- Edit any question or answer by typing in its box.
- Click + Add question for a new one, or Remove to delete one.
- Click Save changes, then hard-refresh the page.
[exsn_faq set="my-set"]). To show it on a new page, edit that page
in Elementor, add a “Shortcode” widget, and paste the code. (Or send me the set’s id and
I’ll place it for you.)Gallery — your photo gallery
Build a photo gallery yourself. Add as many photos as you like with optional captions; they appear on your Gallery page automatically. (Your Gallery page is ready and waiting — just add photos and ask me to publish it.)
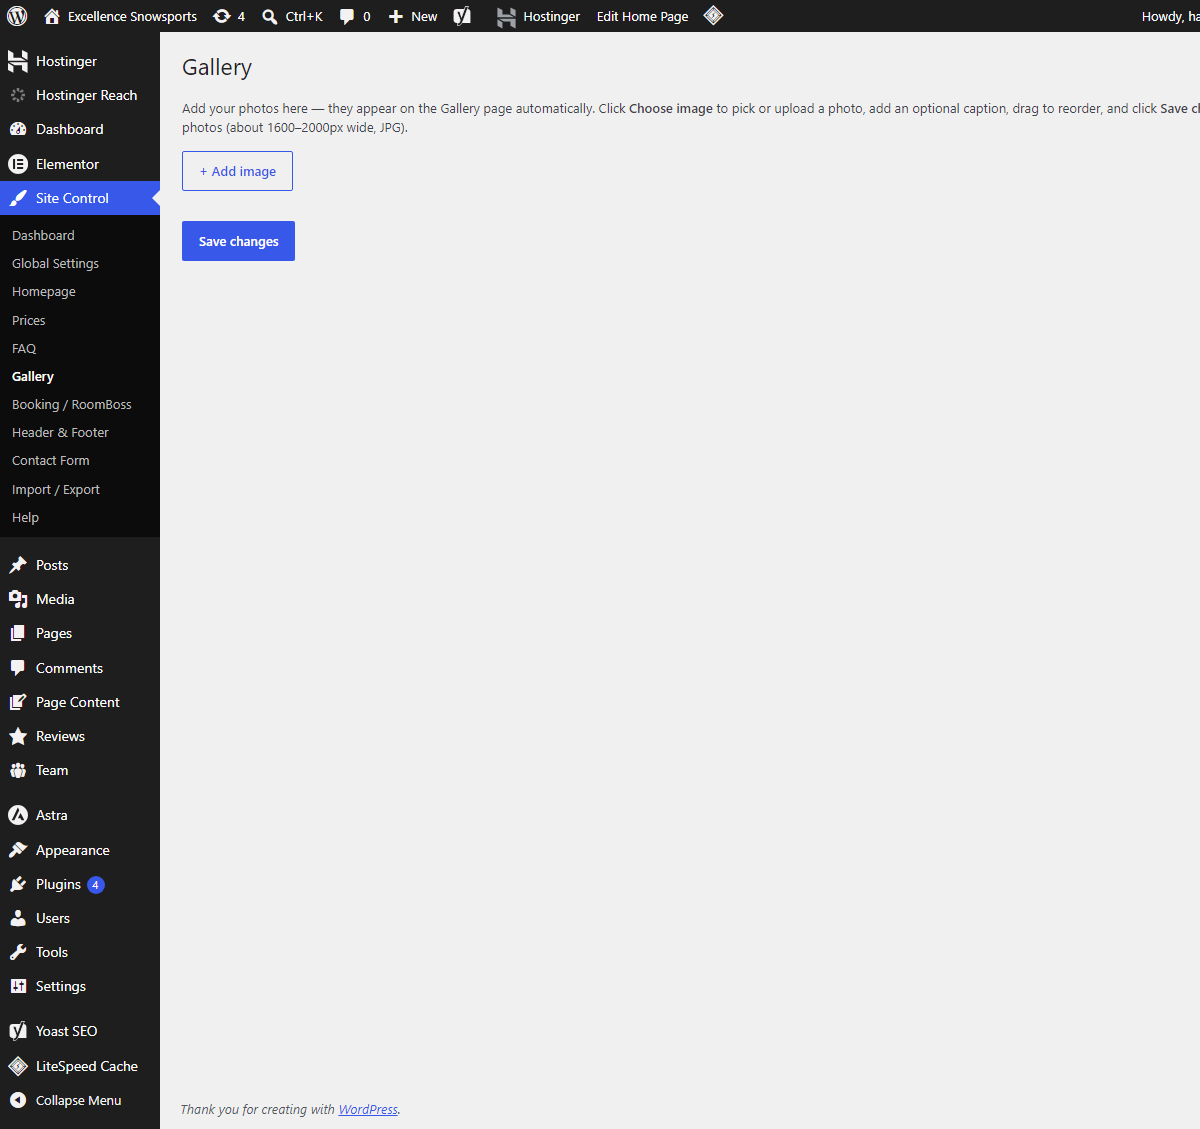
- Go to Site Control › Gallery.
- Click + Add image, then Choose image to pick or upload a photo.
- Add an optional caption. Repeat for each photo.
- Click Save changes.
Programs — the cards on your Home and Lessons pages
Every program card — Private Ski, Private Snowboard, Premium Private, Off Piste, School Trips and Ski Instructor Courses — is edited here. One list drives both the Home page and the Lessons hub, so you only ever write it once. You can change a card, reorder your programs, or add a whole new one.
- Go to Site Control › Programs.
- To change a card: edit the Title, the Description, or click Choose image to swap the photo.
- Level chips are the small outlined labels under the title (e.g. Ski, All Levels). Use + Add chip to add one, and the small × on a chip to remove it.
- Location badges are the pin labels lower down (e.g. Madarao). + Add location adds one.
- Link is where the card’s Explore → arrow goes — write it as a path,
e.g.
/instructor-courses/. - To add a program, click + Add program at the bottom and fill the new card in.
- Click Save changes.
Leave a card empty to delete it. If you clear both the title and the image, that program is removed when you save.
The photo alternates left and right by itself. You do not need to do anything — the cards lay themselves out in a zig-zag down the page, so a new program always lands on the correct side.
Course Videos — the videos on your Instructor Courses page
The videos inside the “More info + CSIA video” panel on your Instructor Courses page are now yours. Swap a video, re-word a caption, or add a brand-new one — paste a YouTube link and save. No developer, no rebuild. And they never slow the page down: visitors see a still picture with a play button, and nothing loads from YouTube until someone presses Play, so you can add videos freely.
The screen has two boxes — Level 1 course cards and Level 2 course card. Each box holds a list of videos, and you can have as many as you like in each.
- Go to Site Control › Course Videos.
- Pick the box you want — Level 1 course cards or Level 2 course card.
- In YouTube link or ID, paste the video’s address — copy it from your browser’s address bar, or from the Share button under the video (both work). A small preview picture appears as soon as the link is right — that is how you know it worked.
- Heading shown on the video — the bold line visitors read, e.g. “Watch the CSIA Level 1 skiing standard”.
- Small line under the heading — the little grey caption, e.g. “CSIA’s own video · 2:38”.
- Video name — the plain title of the video, read out by screen readers and shown in the player. Keep it simple, e.g. “CSIA - Level 1 Skiing Standard - 2026”.
- Click + Add video for another one, or Remove to take one out.
- Click Save changes, then hard-refresh the Instructor Courses page.
Course Cards — add, hide or remove a course
The course cards on your Instructor Courses page — Prep, the Level 1 packages, Level 2 and the private add-on — used to be built into the page, so adding a course or changing a price needed a rebuild. They are now an ordinary screen. Everything on a card is yours: the photo, the corner label, the name, the description, the detail lines, the price and the button.
The screen has two boxes — the Level 1 row (the top row of cards on the page) and the Level 2 & private coaching row underneath it. Each card inside a box is one card on the page.
- Go to Site Control › Course Cards.
- To change something, type in the box — Course name, Short description, Price, Button text — and click Save changes. It is live at once.
- To change the photo, click Choose photo and pick or upload a picture. Fill in Photo description underneath — that is what screen readers and Google read.
- Detail lines are the small rows inside the card (Duration, Language, Dates & location). Use + Add a detail line to add one and the small × to remove one.
- To add a course, click + Add a course card at the bottom of a row and fill the new card in.
- To take a course off the page for a while, untick Show this card.
- To delete a course for good, click Remove on that card, then save.
- Click Save changes.
[exsn_ic_videos g="l1"] — that is what pulls in whatever you set under
Site Control › Course Videos. Delete that line and the video disappears from the card.The dates and fees table is a different screen. Course cards are the boxes near the top of the page; the Dates & fees table further down is edited in Site Control › Instructor Courses, exactly as before.
Starting a new page — from a ready-made draft
There are eight pages already waiting in your admin, saved as drafts: three for a new location, three for a new lesson or programme, and two for a new course. Each one is a full copy of the design — hero, sections, price table, everything — with the words replaced by instructions telling you what goes where. You fill one in and press Publish. No developer needed.
A draft is completely invisible until you publish it: anyone who is not logged in gets a “page not found”, and it is not in your sitemap or in any menu.
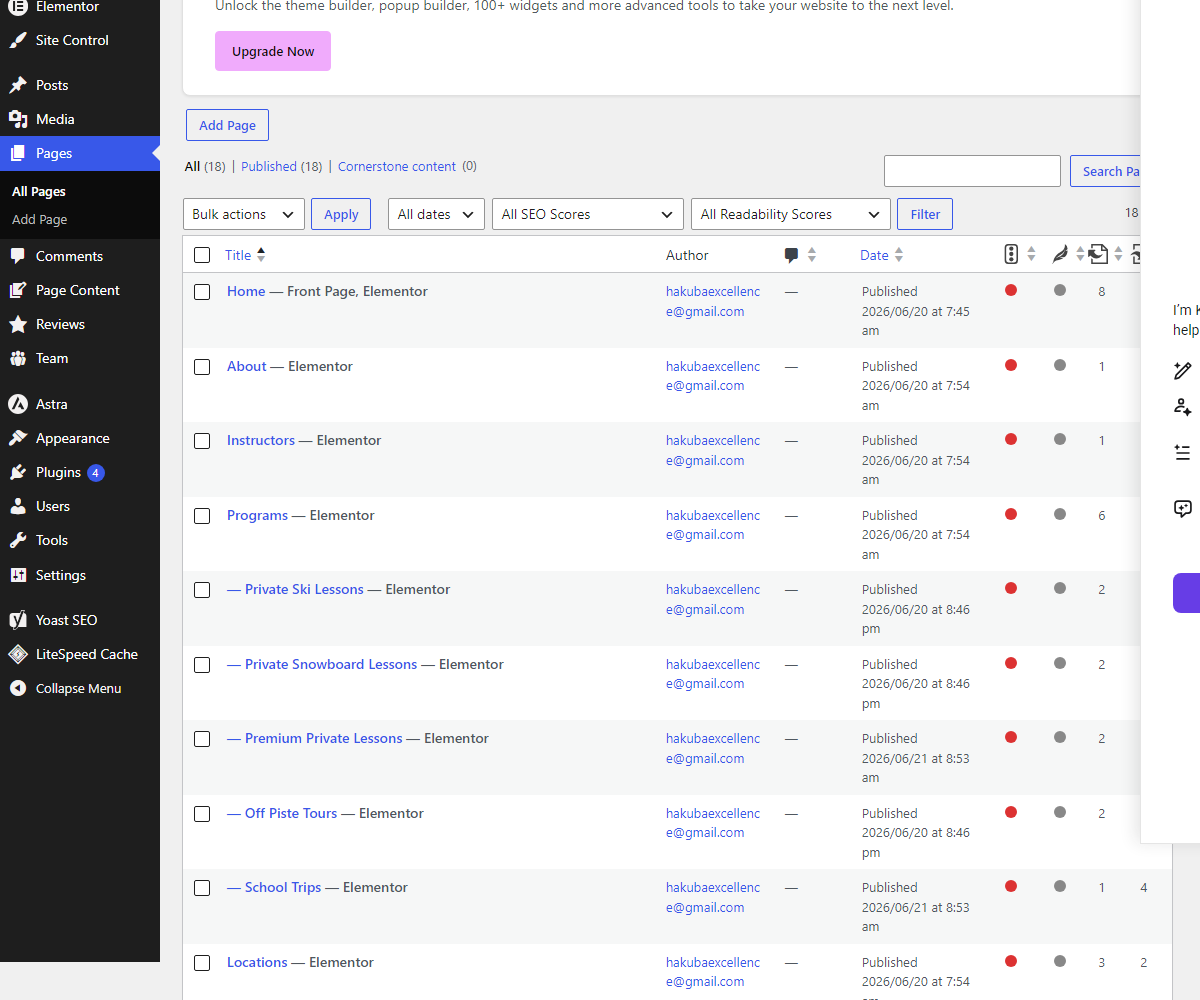
- Go to Pages and click the Drafts filter. Pick the one that matches what you are adding — TEMPLATE — New Location Page, New Lesson Page or New Course Page.
- Go to Page Content in the left-hand menu and choose that page. Every heading, paragraph and photo on it is a field here. Replace each “Write your text here” with your own words, then Save changes.
- Swap the photos on the same screen with Choose image, and fill in the small photo-description box under each one.
- Set the prices in Site Control › Prices. There is a set named after the page you are working on, already filled with a copy of your standard rates — edit the rows and save.
- For a lesson page, do the same in Site Control › FAQ and Site Control › What’s Included. For a course page, the cards are in Site Control › Course Cards, in the box named after your draft.
- Back in Pages, open the draft. Change the title from “TEMPLATE — …” to the real
name, and click Edit beside the web address to give it a clean one —
hakubainstead ofnew-location-1. - Use Preview to read it through, then press Publish.
- If you want it in the navigation, go to Appearance › Menus, tick the page and drag it into place.
Run out of drafts? Tell me and more are added in minutes — they are copies, not handmade pages.
Image sizes, ratio & quality
To keep every page sharp and consistent, the design sets a fixed height for each spot and centers your photo inside it. So you don't set the height — just upload the right shape (ratio) so nothing important is cut.
| Where | Best ratio | Ideal size |
|---|---|---|
| Hero / page banner (top) | 16:9 (wide) | 2560 × 1440 px |
| Program / card images | 3:2 (wide) | 1600 × 1067 px |
| Instructor photos | 4:5 (portrait) | 1200 × 1500 px |
| Gallery photos | any | long side 1600–2000 px |
Getting found on Google
SEO means helping Google show your pages to people searching for ski lessons in Madarao and Geto Kogen. Your site already has the free Yoast SEO plugin doing the hard parts. Your job is to fill in a few simple fields per page. Here is exactly how.
What Yoast does for you automatically
- The sitemap (the list of pages you give to Google) at
/sitemap_index.xml. - The preview picture and text shown when a page is shared on Facebook or LinkedIn.
- Google schema — extra data that can earn richer search results.
The Yoast box — field by field
Open any page and scroll to the Yoast SEO box. Fill in these fields:
| Field | What to put in it |
|---|---|
| Focus keyphrase | The one phrase you want this page to rank for, e.g. private ski lessons Madarao. |
| SEO title | The blue title shown in Google. Keep it under ~60 letters and include the keyphrase. Click Edit snippet. |
| Meta description | A 1–2 sentence summary (~150 letters) with the keyphrase and a reason to click. (I pre-filled these.) |
| URL slug | The end of the web address. Keep it short. Do not change it on existing pages. |
| Traffic-light dots | Aim for green, but orange is fine. They guide you to short sentences and using the keyphrase naturally. |
Ready-made suggestions for your key pages
To save you time, here is a starting point. Use these as-is or tweak them to match how your guests search.
| Page | Focus keyphrase | Suggested SEO title |
|---|---|---|
| Home | ski and snowboard school Madarao | Excellence Snowsports | Ski & Snowboard School in Madarao & Geto Kogen |
| Private Ski | private ski lessons Madarao | Private Ski Lessons in Madarao & Geto Kogen | Excellence Snowsports |
| Private Snowboard | private snowboard lessons Japan | Private Snowboard Lessons in Japan | Excellence Snowsports |
| Off-Piste Tours | off-piste tours Madarao | Guided Off-Piste & Backcountry Tours | Excellence Snowsports |
| Madarao | skiing in Madarao | Skiing & Snowboarding in Madarao | Excellence Snowsports |
| Geto Kogen | skiing in Geto Kogen | Skiing & Snowboarding in Geto Kogen | Excellence Snowsports |
| Pricing | ski lesson prices Japan | Lesson Prices & Packages | Excellence Snowsports |
| Contact | book ski lessons Madarao | Contact & Booking | Excellence Snowsports |
Tell Google about your site (one time)
- Make a free account at search.google.com/search-console.
- Add your site and verify it (Yoast makes this easy — or I can do it for you).
- Under Sitemaps, submit
sitemap_index.xml. - Over the next weeks it shows which searches bring people to you — very useful for refining your keyphrases.
Keeping it healthy
A few simple habits keep your website fast, safe and healthy. Nothing here is hard — and you're never on your own.
After you edit — hard refresh
Your site has a speed booster (caching). After you save, you might still see the old version
for a moment. Press Ctrl + Shift + R (Windows) or Cmd + Shift + R (Mac) to see your
change right away. Still old? Go to LiteSpeed Cache › Purge All.
The plugins you rely on (all free)
| Plugin | What it does |
|---|---|
| Astra + Excellence child theme | Your design and layout. |
| Elementor (free) | The visual page editor. |
| Yoast SEO (free) | All search-engine optimisation. |
| Excellence Site Control | Your custom control panel. |
| Excellence Reviews | Powers the homepage reviews. |
| LiteSpeed Cache | Makes the site fast. |
Backups
- Settings: Site Control › Import / Export saves all your settings to a file.
- Page content: Elementor keeps a History of every page (undo any change).
- Full site: a free plugin like UpdraftPlus, or your Hostinger panel, makes a complete backup.
Quick troubleshooting
| If… | Then… |
|---|---|
| My change isn't showing | Hard-refresh (Ctrl/Cmd + Shift + R). Still old? LiteSpeed Cache › Purge All. |
| I can't find a setting | Is it site-wide (→ Site Control) or inside one page (→ Edit with Elementor)? |
| A page looks odd while editing | Don't save. Use Elementor's History to undo, or exit without updating. |
| The contact form isn't arriving | Email delivery (SMTP) needs setting up once — see Site Control, or message me. |
Common questions
Can I really not break the design?
Correct. Editing text, images and settings only changes those things. The layout is locked, and any change can be undone.
Do I need to know any code?
No. Everything here is done by clicking and typing. The one shortcode ([exsn_book]) is optional, only for new pages.
How do I change my prices?
Edit the Pricing page (and the product page) with Elementor and type the new numbers. Prices live only on those pages.
How do I add a new instructor?
Go to Team › Add New — name, role, photo, order. The Instructors page updates by itself.
Need a hand? I'm here.
Whether it's a quick question or a brand-new feature, I'd be glad to help you get the most out of your website.
M.A. HASIB
Full Stack Web Developer · 8 years of professional experience